Tuesday, 28 October 2014

Self Portrait


This photo represents who I am and who I want to be in the future. In this self portrait I wanted to portray my love for make up and how much I enjoy expanding my collection, I tried to show this by having some of my makeup on my desk. I also wanted it to show how I like to organize my makeup as you can see from the drawer it looks quite neat and tidy, I try to make sure my drawers are organized and are easily accessible. 

I have my Laptop out as I wanted to show the fact I'd like to in the future create YouTube Videos, you can't see it very well from the photo however I have the video recorder on my laptop. I'd love to create videos as from my own experience YouTube taught me everything I know to do with make up. I very much enjoy helping people with makeup and I always have tips and tricks to achieve the best makeup looks. 

As you can tell from the Photo I'm very girly and most things are very colourful for example my fairy lights which out hanging from the shelves, also my shelve are full of photos and beauty products and little bits and bobs. I wanted the background to have pictures I have of family and close friends as they've been the ones to keep me motivated and on the right track. 


Masters of Drawing and Basic Drawing


Masters of Drawing


  • Leonardo da Vinci
Leonardo di ser Piero da Vinci is known to the world as an inventor, scientist, mathematician, and most of all, an artist. Da Vinci is considered to be a true Renaissance man. He was skilled in many subjects, and is respected because of his achievements. He helped pioneer the sciences, developed new art techniques, and was one of the first people to dissect the human body.

Da Vinci was born on April 15, 1452 in Vinci, Italy. His father was a public notary in Milan, and his mother, a simple maiden. When Leonardo was little, he would always try to invent new things, he was very intelligent. At the age of 14, he became an apprentice to one of the best painters at the time, Andrea del Verrocchio. Under Verrocchio, he learned how to paint and sculpt. He also learned skills in metallurgy, drafting, chemistry, and carpentry. Out of all these, Da Vinci chose art as his main profession, but used all that he learned throughout his life.


There are only 15 paintings of Da Vinci that survive. The most famous of which is the Mona Lisa that was painted between 1503-1507. The model who posed for the painting was said to be a young merchant’s wife, but who knows. In this painting, Da Vinci used a new technique called “sfumato”, which is the hazy atmosphere in the picture. The Mona Lisa is one of the most analyzed paintings of all time, because Da Vinci’s face also fits that of Mona’s, which is unusual for any painting.

(http://totallyhistory.com/leonardo-da-vinci/)


  • Michelangelo Buonarroti
Michelangelo Buonarroti was born on March 6, 1475 in Caprese, Tuscany, Italy. His father was a banker, which put his family within the middle class of the social hierarchy at the time.
rom 1534-1541, he painted The Last Judgment on the wall of the Sistine Chapel, which was commissioned by Pope Clement VII. Several prominent people are painted into this scene, which came as a surprise. Some of the town’s folk are represented in hell, particularly a certain politician, known for his underhanded dealings. Michelangelo has a self portrait in there as well; the skin Bartholomew is tearing off himself is Michelangelo but unlike the politician, he is in Heaven.

(http://totallyhistory.com/michelangelo-buonarroti/)


Basic Drawing 


In our lesson with Kat we learnt some basic drawing skills, she started of by showing us how to hold your pencil. When drawing you must hold your pencil at the top as this gives you more control and also to use your arm instead of your wrist.

We started off by practicing drawing a straight line making sure to hold the pencil at the top and moving your arm to draw the line. At first I found this quite difficult because I've always held my pencil in the middle and used my wrist to control the movement. We had to continuously draw lines from the top to the bottom, then we had to draw diagonal lines. It was slightly repetitive which meant I did lose concentration however it did help to practice holding the pencil from the top.


After we'd filled the page with straight lines, we were told to draw 2D shapes for example Circles, Squares and triangles. I quite enjoyed this as I was determined to get a perfect shape, I don't think I did to bad. I preferred drawing the circles as they were easy, the squares were a little more tricky as all sides had to the same.


Once we'd practiced drawing 2D shapes we had to make them 3D, I drew a cone, cylinder and a cube. After that we had to shade them in using our sketching pencils to give them dimension. I enjoyed doing this as I normally don't like to draw however I found because I haven't done it in a while it was quite relaxing and calming. I quite excited to practice a little more and to try make still life look more realistic. 

My Still Life 

This is my still life drawing of a MAC Lipstick, I used all the techniques I learnt from class and I tried my best to make it as realistic as possible. I really enjoyed drawing this still life and I definitely won't to continue to practice more to improve more.


Kevyn Aucoin

(American Makeup Artist, Photographer and Author)

http://softspoken.softsurroundings.com/wp-content/uploads/2012/07/T
_KevynGold1_PRESS-SHOT.jpg


Kevyn James Aucoin February 14th 1962 – May 7th 2000

Kevyn was considered the world’s first celebrity make-up artist. He did makeup on Naomi Campbell, Cher, Julia Roberts and Cindy Crawford, he was known for his charm and charisma which secured his fame.

“The best thing about him doing your make-up, is that it allows you to spend time with him." - Gwyneth Paltrow


http://media-cache-ec0.pinimg.com/236x/4f/9f/f0/4f9ff0d1070063b1c7290446d3566504.jpg
Gwyneth Paltrow Makeup by Kevyn Aucoin
(Eyebrows to die for)
Kevyn had a lot of influence on the beauty industry, being largely responsible for the beauty stylings of the 1990s such as Brooke Shield’s matte lips, Christy Turlington's arched brow and Cindy Crawford’s lipliner. He wrote three bestselling books, The Art of Makeup, Making Faces and Face Forward, expressing his unique aesthetic. 
He made tutorials to create his famous looks, from how to contour your face like Gwyneth Paltrow to achieving Courtney Love’s smeared lips and smoky-eyed grunge look. He also launched a groundbreaking makeup line with Revlon titled The New Naked, which catered for all skin-tones, before introducing a cosmetic range under his own name in 2001. He was awarded a CFDA Award from the Council of Fashion Designers of America in 1994, and remains the only makeup artist to have received the honour.
http://bandofthebes.typepad.com/bandofthebes
/images/2008/02/14/aucoin.jpg
http://www.cindy.com/sites/default/files/cover-vogue_august_1986.jpg


http://www.premiermodelstyle.com/premier-blog/wp-content/uploads/2014/10/kevyn-aucoin.jpg


However before all the fame and celebrities, he was adopted into a strict Catholic family and bullied throughout school for his effeminate leanings. Unfortunately he suffered from a rare condition called acromegaly which is a tumor on the pituitary grand that causes an overproduction of the growth hormone. As his reputation grew, he was also growing physically and this relentless pain led to a long-term prescription drug addiction. He began to collapse onset, and his closest friends urged him to seek help. When Aucoin passed away in 2002, due to complications arising from his condition, his loss shook the fashion world, who united in mourning to pay tribute to his outstanding legacy. 

"He was one of the loveliest people I have ever met, He always made me feel like like my best self." - Kirsty Hume

Karen Elson Before Transformation
http://media-cache-ak0.pinimg.com/236x/28/fd/d4/28fdd45c80
eaa41a0bf92113b37d2389.jpg
Queen Elizabeth I - Karen Elson

While looking through some of Kevyn's work I found this photo from Photo shoot he'd created with model Karen Elson. The look is one of his many transformations, he'd transformed Karen into Queen Elizabeth I. I love the look he's created as you can see the amazing transformation from a beautiful super model into an eyebrow-less Queen Elizabeth I.  


Websites Used:

  • http://www.anothermag.com/current/view/4039/Remembering_Kevyn_Aucoin
  • http://www.themakeupgallery.info/various/photo/history/kastars.htm

Monday, 27 October 2014


As it's Halloween this week, in class we were given a task to recreate a sugar skull look based off pictures given to us in class. We were given limited time to create a very detailed look, this is about all I could manage in this time. I definitely think if I had more time I would have been able to create something more intricate, however I'm pretty much pleased with how the circles came out on the eyes. The white base created was very even and smooth, I definitely need to work on getting the makeup symmetrical for example the nose isn't the same on both sides and also the circles round the eyes aren't perfect. 

I used the White Skin Base Foundation from Illamasqua and Kryolan Supracolor Palette.


Sunday, 26 October 2014

Monochromatic Colour Look 


We had to create a Monochromatic Look firstly on Face Chart, I decided to go with colour Blue. After we had created the look on the Face Chart we had 45 minutes to recreated it on to a Model. I really enjoyed creating the look on the Face Chart as I never normally use the colour blue. I made the skin slightly blue and also the lips blue, I tried to use all the same shades of blue or colors that were close enough. 


When we were told we had only 45 minutes to recreate the look on a model I was a little nervous as I don't always work well under a time limit, however I'm quite pleased with the final outcome. I slightly changed the look half way through the creation, as you can see on my face chart I've applied dark eye brows however I decided to change the colour of my Models eye brows to Blue as I thought the blues would blend better and I'm glad I did. I did have a couple of issues when I was applying the make up, for example when I was applying the blue creme contour colour I found it slightly hard to blend out and also when I applied the blue powder contour I found that extremely hard to blend out and I preferred the right side of my models face more. The colour of the lips was slightly more of a turquoise colour so it didn't match the rest of the blue on my Models face. This task did challenge me as I like to spend a lot of time creating a look and this made me realize that actually in the makeup industry you don't tend to have a lot of time to create a look. The things I'd improve on next time is making sure to start with a small amount of product on my brush and to slowly build as this will help me blend my colours better. Also I'll make sure I have all the products in front of me as this will help to create the look quicker without having to look for products.

Colour Theories


Color wheel

The Colour Wheel


The color wheel or color circle is the basic tool for combining colors. The first circular color diagram was designed by Sir Isaac Newton in 1666.

The color wheel is designed so that virtually any colors you pick from it will look good together. Over the years, many variations of the basic design have been made, but the most common version is a wheel of 12 colors based on the Artistic color model.


Primary, Secondary and Tertiary Colours


Primary Secondary Tertiary Colors

Primary Colours
  • Red, Yellow and Blue
  • Primary Colours are the three Colour that can't be mixed or created from any of the other colours
  • All the other colours are created from these three colours
Secondary Colours
  • Green, Orange and Purple
  • Created from Mixing the primary colours
Tertiary Colours
  • Yellow - Orange, Red - Orange, Red - Purple, Blue - Purple, Blue - Green and Yellow - Green 
  • These colours are created from a mixture of Primary Colours and Secondary Colours


Colour Harmony


In visual experiences, harmony is something that is pleasing to the eye. It engages the viewer and it creates an inner sense of order, a balance in the visual experience.

Some Formulas For Colour Harmony

  • Complementary Colour Scheme
Colors that are opposite each other on the color wheel are considered to be complementary colors (example: Orange and Blue).


  • Analogous Colour Scheme
Analogous color schemes use colors that are next to each other on the color wheel. They usually match well and create serene and comfortable designs.


  • Achromatic Colour Scheme
Achromatic Colour Schemes use only black, white and grey, they posses no other hue.


  • Monochromatic Colour Scheme
Monochromatic color schemes are derived from a single base hue.


Websites Used :

  • http://www.tigercolor.com/color-lab/color-theory/color-theory-intro.htm
  • http://www.colormatters.com/color-and-design/basic-color-theory
  • http://en.wikipedia.org/wiki/Monochromatic_color

Saturday, 25 October 2014

Eye shadow Application and Lipstick Application


When applying eye shadow it’s important to use the right technique on the correct eye shape. Use a chart for example the one below to choose the correct eye shape of your model. My Model for example had Deep set eyes.


Step by Step on how to apply eye shadow

  • Firstly decide which eye shape your model has and also ask your model whether or not they wear contact lenses.
  • Apply a thin layer or foundation or eye shadow primer all over the lid and apply powder to the eye lid – this will prevent any eye shadow from creasing.
  • Use a loose translucent powder heavily under the eye with a puff – this will help when removing any fallout from the eye shadow.
  • Use your puff to gently hold the eye taunt – this will help with getting eye shadow to those hard to reach areas.
  • Apply the lightest colour all over the lid and on the brow bone – this will give an all over colour.
  • Use the second darkest shade on the crease and on the outer part of the eye – this will create depth and will enhance your models crease, make sure to blend down the lash line.
  • Use the darkest colour to go over the second darkest eye shadow this will help to intensify the crease and help to create a Smokey eye – remember when applying eye shadow less is more.
  • When creating a eye liner from shadows, slightly wet your hard angled brush and scrap some eye shadow from the pan and create a paste. Use the paste to create a winged eye liner look.
  • When applying Mascara make sure to always use disposable mascara wands and remember never to double dip. Get your model to firstly look up and wiggle some mascara on the bottom lashes, do the same for the top lashes however ask your model to look up.
  • Softly feather some eye shadow through your models eye brows to bring the whole look together.

My First Attempt


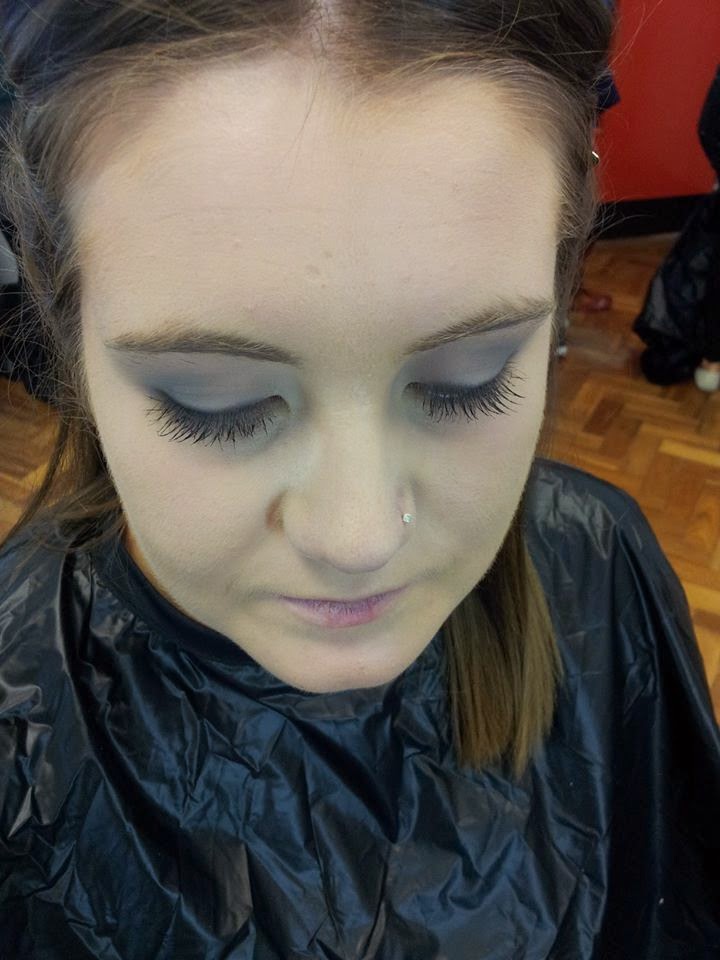
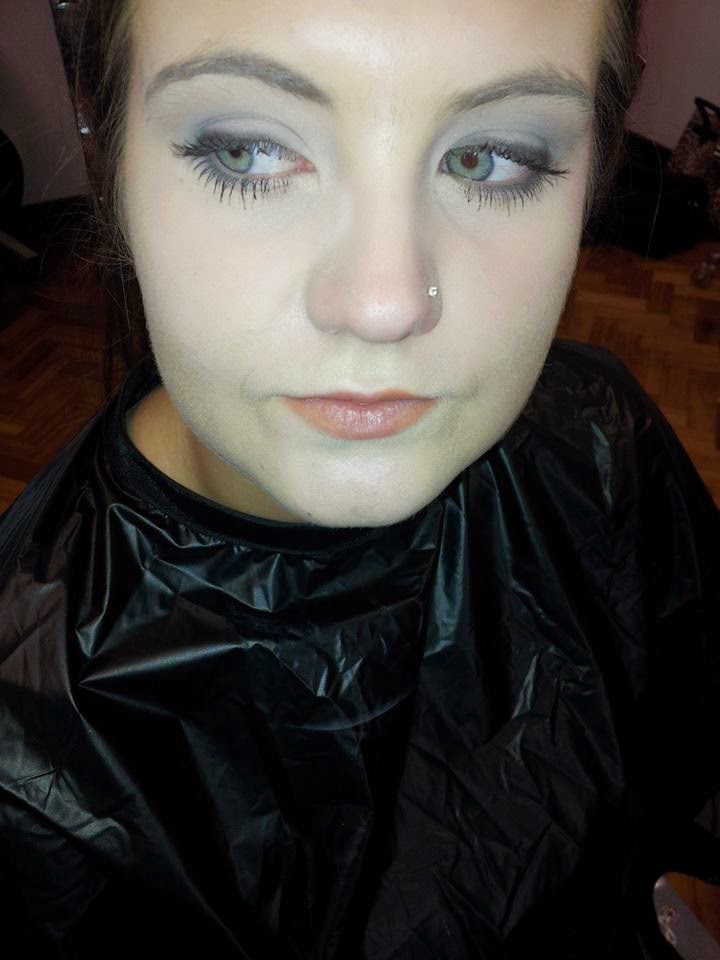
I didn’t find this practical very hard however I found the eye shadows we used very difficult to blend out. I found using the eye shape chart very useful as I had a clear plan on where to place the eye shadow, as my model had deep set eyes I used the darker colours round her lashes and she had slightly hooded eyes.  After I’d finished you could see the difference and how it had enhanced her eyes. I’m looking forward to working on different eye shapes in the future.

Applying Lipstick

  • Firstly make sure your model’s lip as moisturized by using a lip balm – get your model to apply the lip balm as they can really work the product in.
  • Use a tissue to blot the excess lip balm of and decide which colour lip stick you’d like to use.
  • Decanter some lipstick onto a stainless steel palette using a spatula, use your angled brush to apply the lipstick,
  • Ask your model to open her mouth and slightly stretch her lips this will help when applying the lipstick so you don’t miss any areas.
  •  Once applied ask your model to rub lips together as this will work the product into the lips.
  • Use a tissue split in to two pieces then blot the lips, then apply powder on top then apply the lipstick again.


Thursday, 23 October 2014

History of Tudor Cosmetics


During the Elizabethan era cosmetics were worn by upper class women and also women of Nobility. It was Queen Elizabeth I who set the fashions and make up trends. It was important that Queen Elizabeth I kept her image of a 'Virgin Queen' she did this by making sure her complexion was snow white which was complimented with red cheeks and red lips. A pale complexion could only be achieved by upper class women and not lower class women as they had to work outside which consequently gave them a suntan. A pale complexion was a sign of wealth and nobility. 

(https://hankwhittemore.files.wordpress.com/2011/06/elizabeth-1.jpg)

Queen Elizabeth achieved her image of a pale complexion by using white makeup. As you can see from the Portrait of Queen Elizabeth above that her skin is extremely white she achieved this my using makeup called Ceruse which is a mixture of white lead and vinegar, however this was poisonous as it was highly toxic and many women died rather young from lead poisoning. Elizabeth I would have also used this makeup to hid any signs of ageing. Face paints made from plant roots and leaves were also applied. For the cheeks and lips they used expensive dyes such as Cochineal to redden the cheeks and lips or they could use Madder and vermilion. Kohl was used to darken the eyelashes.


Websites Used
  • http://www.elizabethan-era.org.uk/elizabethan-make-up.htm
  • http://timesoftudors.blogspot.co.uk/2013/02/the-ideal-beauty.html


Sunday, 19 October 2014

Interpretations of Queen Elizabeth I through Film


Fire Over England 

Queen Elizabeth is running this show. The men in her court should be thinking about how to add to the glory of the Elizabethan Age and how to foil those pesky Spanish who got far too much influence in England when her older sister Mary was on the throne after their father Henry VIII was succeeded by their sickly half brother. Elizabeth thinks Michael Ingolby can do great things. Michael is mostly thinking about one of Elizabeth's ladies in waiting, Cynthia. Soon his mind is on survival when Elizabeth sends him on a voyage to Spain.

Her Makeup Artist was Perc Westmore. Flora was a typical Hollywood Beauty but I personal think she suited this role of Queen Elizabeth I, as I don't the real Queen Elizabeth I was known for her beauty she was very plain.


Elizabeth I (1998)

After a stressful childhood Elizabeth (Cate Blanchett), the daughter of Anne Boleyn, comes to the throne and discovers life does not get any simpler. Eventually she comes to realise that the only way to survive and rule is to become the Virgin Queen.

Jenny Shircore was hair and makeup designer; Anita Burger was makeup artist. Like Bette Davis and Glenda Jackson before her, Cate submitted to having her hairline shaved to achieve the authentic Elizabethan look. Jenny Shircore won the makeup Oscar but Cate lost out to Gwyneth Paltrow in another Elizabethan movie:Shakespeare in Love.

Cate also starred in the a sequel (Elizabeth The Golden Age) focusing on Elizabeth’s relationship with sir walter Raleigh. 


The Virgin Queen (1955)


A young Walter Raleigh is introduced to Queen Elizabeth I (Bette Davis). An unlikely friendship grows but is threatened by her jealousy of his love for a beautiful lady-in-waiting. Raleigh is imprisoned in the Tower of London but Elizabeth relents and Raleigh sails off with his love

Perc Westmore was Bette’s makeup artist again. He reportedly persuaded her to shave back her hairline: she wore the nightcap for the Oscars.

Websites Used :
  • http://www.themakeupgallery.info/period/c16/uk/elizabeth/virginbd.htm
  • http://www.themakeupgallery.info/period/c16/uk/elizabeth/fire.htm
  • http://www.imdb.com/title/tt0028872/plotsummary
  • http://www.themakeupgallery.info/period/c16/uk/elizabeth/elizabethcb.htm

Saturday, 18 October 2014


The Westmore Family


http://makeupmag.com/images/5322_MA_17_House%20of%20Westmore.jpg


http://tommenterprises.tripod.com/sitebuildercontent/sitebuilderpictures
/.pond/westmorebrothers.jpg.w300h204.jpg

The Westmore Family are an important family in Hollywood makeup, they introduced the art of makeup to the motion picture industry. There are four generations of this Westmore family who've served Hollywood as makeup artist. 


George Westmore (1879 - 1931) 

Born in Great Britain on the Isle of Wight. He fought in the South African War and after married a hometown friend Ada Savage (Died in 1923). George opened his first hairdressing salon, he moved to Canterbury and then to Canada working as a hairdresser in different cities before moving to L.A in 1917. He soon got a job at the Selig Studio and established the first studio makeup department in history. He then moved to Triangle Studios and supervised the makeup for stars like Mary Pickford, Douglas Fairbanks, Lillian and Dorothy Gish, Billie Burke, Norma Talmadge and Theda Bara. During the 1920's his work became overshadowed by his sons and after a series of disappointmens together with an unhappy second Marriage he committed suicide in 1931.

George fathered three legendary generations of movie makeup artists starting with his six sons Perc, Ern, Monte, Wally, Bud and Frank. By the 1926 Monte, Perc, Ern and Bud had penetrated the industry to become the chief makeup artists at four major studios. the brothers continued to break ground in the beauty and horror illusions until the end of their careers. 

Monte (1902 - 40) 

First worked free lance for directors such as Cecil B. deMille but then joined the studios of David O. Selznick supervising makeup during the screen tests for films such as 'Gone with the Wind' (1939). 

Perc (1904 - 70) 

Headed the make up department of First National Pictures and then that company was absorbed by the Warner Brothers where he remained for 27 years. Later on in life he joined the Universal Studios. Perc was also chief administrator f the salon on Sunset Boulevard, the house of Westmore (1935 - 65) but the rest of the family were financially involved too.

Ern, Perc's twin brother (1904 - 68) 

Worked first at First National ans then became head of makeup at RKO where he won his first award ever given to a makeup artist by the Academy of Motion Picture Arts and Sciences for his work on the film 'Cimarron'. Ern later supervised makeup at the 20th Century Fox Film Corporation.

Wally (1906 - 73) 

Headed the makeup department at Paramount Studios for 41 years. Bud (1918 - 73) worked at Paramount and 20th Century Fox and then was Chief makeup artist as Universal Studios for almost 24 years. Frank Westmore (1923 - 85) was long associated with Paramount Pictures.


http://www.donteverloveme.com/diary/wp-content/uploads/2010/11/c1943.jpg

Websites Used:
  • http://www.filmreference.com/Writers-and-Production-Artists-Vi-Win/The-Westmore-Family.html
  • http://www.britannica.com/EBchecked/topic/641129/Westmore-Family
  • http://www.donteverloveme.com/diary/category/old-hollywood/page/2/

London Trip to MAC and Charles Fox in Convent Garden

On the 10th October our course took a trip to London to firstly visit the National Portrait Gallery to get inspiration for our Elizabethan Portraits. After we'd visited the Gallery we were allowed to visit - Illamasqua, MAC and Charles Fox. My group only managed to visit MAC and Charles Fox.

Charles Fox

 
 We first visited Charles Fox, I absolutely adored the exterior in the main window they were showing all the Halloween make up, prosthetic's and wigs etc. Charles Fox is best known for stocking makeup and prosthetic's best for theatre/Film. We were given a tour which we showed the store and we shown all the make up and prosthetic's. 

MAC


Secondly we visited MAC in convent Garden. Again the exterior was inviting and chic, the interior complemented the exterior as it was very modern. The store itself was quite small, on the first floor they had all the normal products which were available for the general public to purchase, but downstairs they had the pro store. We were given 35% of in MAC so I took full advantage. I purchased the Pro Long wear Concealer, a paint pot in Painterly, a glittery purple pigment and two chromoline eye liners one in white and the other in purple. The staff in MAC were extremely helpful recommending products and explaining each product in depth. I loved the atmosphere in MAC as it was very modern and professional.


Project 'The New Elizabethans'

First Assignment

Our first assignment is looking at the Elizabethan look and combining it with a contemporary look to create a New Elizabethan look. 
When we received our first project brief I wasn't that excited as I've never liked history, however I've always had an interest in the Tudor times. I was looking forward to creating a mixture of a historic look with a modern look. 
As part of the brief we had to start researching in more depth the Elizabethans, I really enjoyed doing this as I've always loved watching the period dramas on TV about the Tudors. When I was researching it became more apparent that the Elizabethan era was a very important historic era and that a lot of a fashion and makeup is actually influenced from that era.
(http://www.npg.org.uk/collections/search/portrait/mw02082/Queen-Elizabeth-I?LinkID=mp01452&search=sas&sText=Elizabeth&OConly=true&role=sit&rNo=13#sitter)
I found this picture at the National Portrait Gallery when our course went to London for the day. The artist of this Portrait of Elizabeth I is unknown. When were at the Gallery this particular portrait stood out to me as I love the colour theme which is a light grey-ish blue. Elizabeth is covered in what looks like pearls which shows her wealth and power . I found in this portrait Elizabeth looks flawless with a subtle flush of blush which is similar to colour on her lips. I love the strength that is portrayed from this portrait and her beauty.
I definitely want to incorporate an aspect of this portrait into my New Elizabethan Look.


Face Charts

My first attempt of a Face chart using powder products such as eye shadow's, blusher's and face powder. Face chart are useful for designing a look before applying on a actual face. This was my first Face Chart I created a dramatic eye look with a bold lip. 


I experimented with contouring to make face chart look more realistic. I used a small eye shadow brush to define the cheek bones and I used other small eye shadow brushed for the eye make up. I used lipstick for the bold lips and I used a black colouring pencil for the eye lashes and eyeliner. 

I'm relatively happy with my first face chart, I struggled with blending the eye shadows on the paper and also I found it hard to make it look realistic. I think I need to work on making face charts as human looking as possible as that will help me design any makeup looks better.


This is my second attempt as I wanted to have a little more practice so I designed a purple themed look. I used eye shadow on the eyes and a black pen for the eye lashes and eyeliner. I used a eyebrow powder for the eye brows with a couple of strokes of brown pencil colour. For the lips I used a purple lipstick. For the contouring I used a matte bronzer with a big eye shadow brush to carve out the cheekbones.
I'm much happier with my second attempt as I tried to correct any mistakes from my first attempt. I still need to work on making the face chart look realistic.